Archives Manual
Getting Started
Notice your username hyperlinked at the very top of this and every other page within the wiki. This will link you to your very own User page that you can use to create a customized profile. After reading about Editing Content, try testing the basic editing functions on this page to create a basic profile page. You can edit it again in the future.
Editing Content
There are two simple languages available available to contributors for wiki editing.
- RichTextEditor - default editing screen. Good for basic content/textual editing.
- WikiTextEditor - accessed by clicking [Show WikiTextEditor]
The RichTextEditor menu bar may appear familiar as it contains some functions similar to a word processor, but it can be tricky. The safest and most effective way to edit content is by using the WikiTextEditor, as an understanding of this language will make the editing of existing content much easier. For basic editing, the RichTextEditor should suffice.
After modifying an entry—before saving any changes—the contributor should strongly consider making use of the Show preview option next to the Save Page button - this allows the contributor to see the consequences of the changes made and modify any errors prior to saving them to the wiki.
- Note the option to provide a summary as well - this should be utilized when editing the content created by another, justifying why any changes were made.
New Entries
The simplest way that a contributor can create a new entry is by adding the title of the prospective entry to the wiki's URL - below we've added Example:
- If this title has already been assigned to an entry, the contributor will be directed to the existing entry.
- If this title has not yet been assigned, the contributor will be directed to a page similar to this:
*Note the option to Create next to the Search Box - clicking this will initiate the creation of a new entry. Upon saving the content of this entry, the contributor will have successfully created a new entry!
Linking within the Wiki
One of the most powerful and important components of the Wiki is the interconnectivity of its entries. When an entry is not linked to other entries it will be difficult for the user to find via browsing. While it will still be possible to locate the page with the search function, the increased visibility attained through appropriate and relevant linking will add value to your wiki entry. There are several ways to link your entry to the established body of information.
Internal Links
An internal link is used to direct the user to another page within the UNB wiki. These internal links are the most effective way to connect entries and are an indispensable component of user navigability through the wiki.
To create an internal link, enclose the title of the destination entry with double square brackets on either side:
If the destination entry exists and has been entered correctly (remember that Mediawiki is case sensitive - the first thing that the contributor should check for if a link does not work is the spelling and capitalization of the destination within the WikiTextEditor code), an operational link will be created.
If the destination entry does not exist, the hyperlink created will connect to a new page upon which an entry can be created, either immediately or in the future. The practice of creating links to non-existent pages is called lazy linking - this can be an effective way to communicate to other contributors the pages that need to be created in the future.
http://unbhistory.lib.unb.ca/index.php/Special:WantedPages.
Here is how you would create a category like Page Under Development,
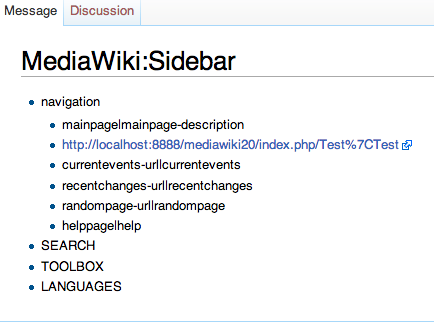
Adding Pages to the Sidebar
After creating pages, in order to add those pages to the sidebar. Follow the following steps.
- Go to the address bar. In our case the url is site-url/Main_Page
- Replace page name (Main_Page) in above case with “MediaWiki:Sidebar”.
- The new address looks like this, site-url/MediaWiki:Sidebar
- Go the above url and the wiki sidebar will be displayed.
page-url|page-name (systems.lib.unb.ca/wiki/Test|Test)
- Click on Edit.
- Make changes to the links according to the following rule
- Click “Save Page” and see changes in the navigation.
Editing
- On clicking “edit this page”, an editor is displayed. This is the WYSIWYG editor.
- Start typing in the space below.
- On finishing edits, click the Save Page button to save changes.
Images
On clicking “edit this page”, you should notice a blue bar at the top of the editor with the following message “Drop files here”. This bar will be used to insert images in the text.
Inserting Images
- Drag and drop an image over the blue bar with the message “Drop files here”.
- You will see your image listed in the bar.
- Click on “Click here to upload this file” to upload the image.
- The image is uploaded, and the bar turns green.
- To insert the image click on the “Image” icon in the editor.
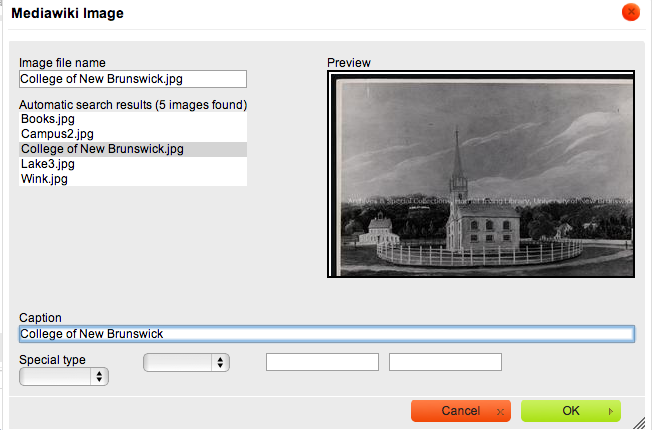
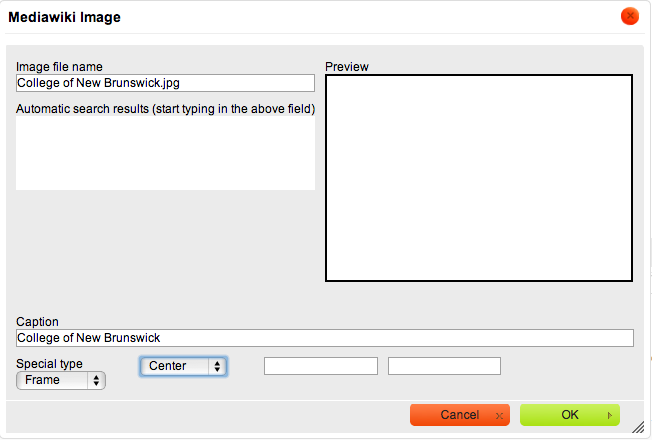
- On clicking the image icon, the editor prompts with a dialog box, containing the list of images uploaded in the wiki.
- Choose an image by clicking on it and entering a caption for it in the Caption textbox.
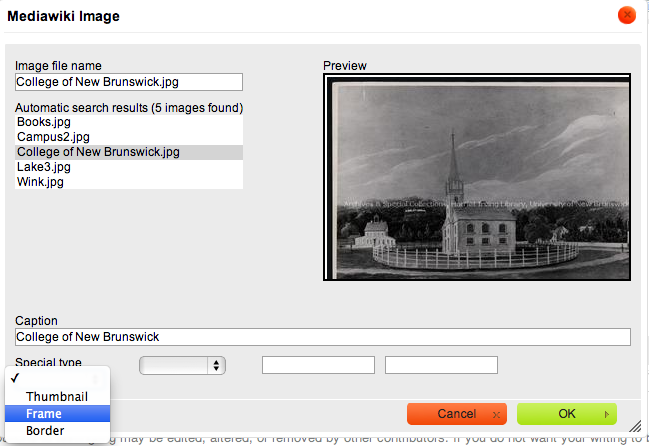
- Choose if you want to make it a thumbnail or an image with a border around it from the dropdown “Special type”.
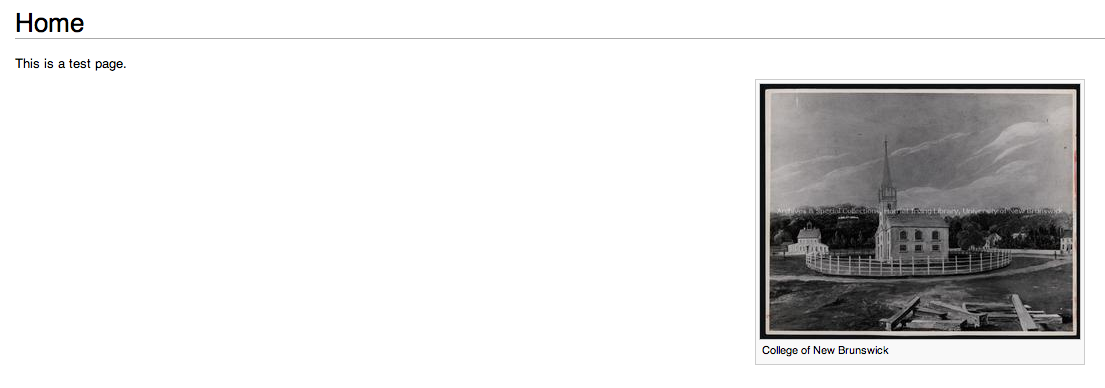
- In this case, I will choose a Frame around the image and click “OK”.
- Click Save page to save your edits.
- You can put the image in the center of the page using another option in the image dialog box, i.e. if you want to place the image in the center, choose center from the options dropdown.
</div>


