Archives Manual
Jump to navigation
Jump to search
{{#allow-groups:sysop}} This is an attempt to clone the UNBArchives from Wikispaces to Mediawiki.
- UNB Archives (http://unbarchivesandspecialcollections.wikispaces.com/)
- Mediawiki (http://www.mediawiki.org/wiki/MediaWiki)
In our analysis of the workflows in Mediawiki, following operations were identified as necessary for the creation of a duplicate site. Please carefully follow the instructions to get desired results.
Page Creation
- If I want to create a page i.e. Home, enter following address in the address bar site-url/Home) and go there. This will create a new page - Home.
- Click on “edit this page” to start making/editing the new page.
Category Creation
Here is how you would create a category like Page Under Development,
Create page:
Category:Page_Under_Development
Add this line to the end of all pages that you want to put in the above category
[[Category:Page Under Development]]
Click on category to see all pages linked.
Adding Pages to the Sidebar
After creating pages, in order to add those pages to the sidebar. Follow the following steps.
- Go to the address bar. In our case the url is site-url/Main_Page
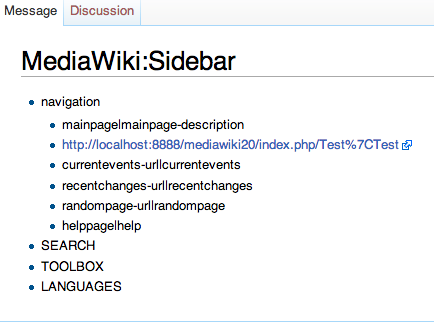
- Replace page name (Main_Page) in above case with “MediaWiki:Sidebar”.
- The new address looks like this, site-url/MediaWiki:Sidebar
- Go the above url and the wiki sidebar will be displayed.
page-url|page-name (systems.lib.unb.ca/wiki/Test|Test)
- Click on Edit.
- Make changes to the links according to the following rule
- Click “Save Page” and see changes in the navigation.
Editing
- On clicking “edit this page”, an editor is displayed. This is the WYSIWYG editor.
- Start typing in the space below.
- On finishing edits, click the Save Page button to save changes.
Images
On clicking “edit this page”, you should notice a blue bar at the top of the editor with the following message “Drop files here”. This bar will be used to insert images in the text.
Inserting Images
- Drag and drop an image over the blue bar with the message “Drop files here”.
- You will see your image listed in the bar.
- Click on “Click here to upload this file” to upload the image.
- The image is uploaded, and the bar turns green.
- To insert the image click on the “Image” icon in the editor.
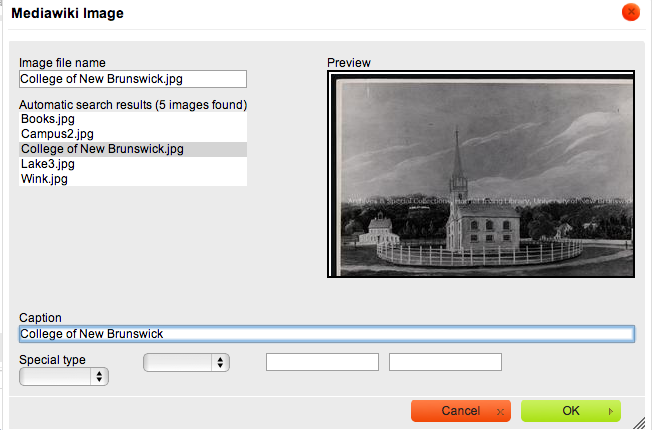
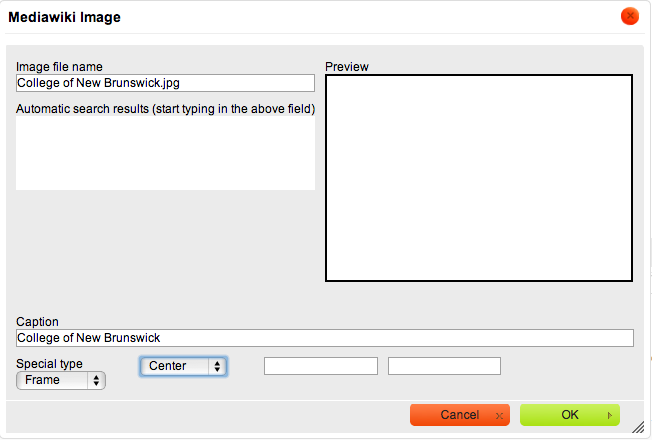
- On clicking the image icon, the editor prompts with a dialog box, containing the list of images uploaded in the wiki.
- Choose an image by clicking on it and entering a caption for it in the Caption textbox.
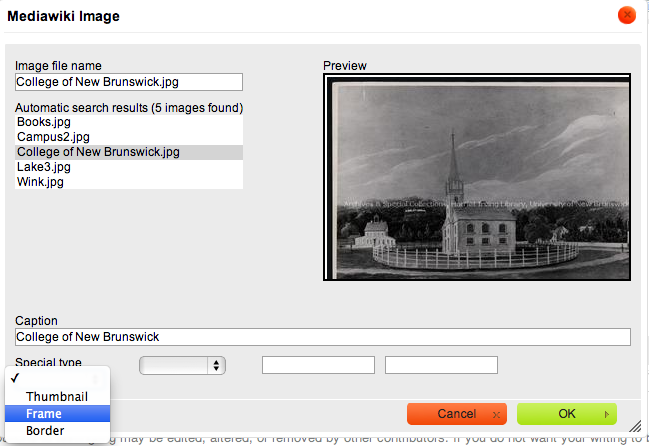
- Choose if you want to make it a thumbnail or an image with a border around it from the dropdown “Special type”.
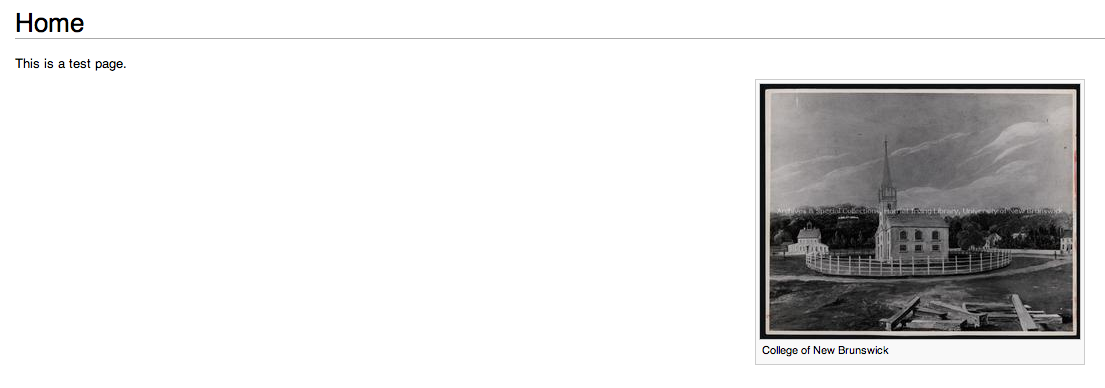
- In this case, I will choose a Frame around the image and click “OK”.
- Click Save page to save your edits.
- You can put the image in the center of the page using another option in the image dialog box, i.e. if you want to place the image in the center, choose center from the options dropdown.

